
Kitchen planning
Kitchen Lighting Layers and Electrical Planning
A good kitchen lighting plan uses three layers: ambient light for moving around the room, task light aimed at counters, the sink and the cooktop, and accent light for glass cabinets, shelving or a feature wall. Each layer should be controlled separately, compared in lumens rather than watts, and coordinated with the cabinets and the electrical plan before walls are closed. Lighting decided after the cabinets are ordered usually means compromises.
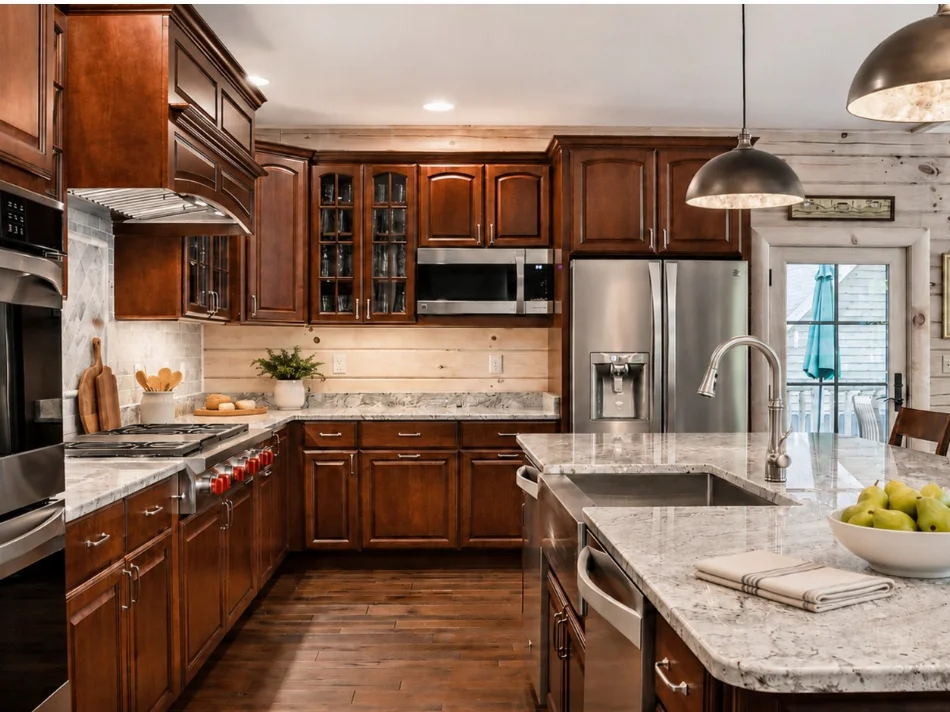
Map activities and daylight before choosing fixtures
Start with the final kitchen plan, not a fixture catalog. Mark where people prepare food, cook, wash up, read recipes, eat, store things and walk through. Then notice the room at different times of day: where daylight comes from, where shadows fall in the evening, where glare bounces off a shiny counter, and which switches are awkward to reach.
That map sets the priorities. A household that cooks every night needs strong, shadow-free light on the main prep counter. A kitchen used for homework or entertaining needs a softer setting too. There is no universal number of fixtures or lumens per square foot that fits every kitchen, because room shape, ceiling height, surface colors and finishes all change how light behaves.
Give ambient, task and accent lighting distinct jobs
Ambient lighting provides general, even light for moving around and finding things. In most kitchens it comes from recessed ceiling lights, surface-mounted fixtures or a combination. Task lighting is directed at a specific activity: under-cabinet lights for the counters, a fixture over the sink, the range hood light over the cooktop and pendants over an island work surface. Accent lighting adds emphasis, such as lights inside glass-front cabinets, on open shelving or above wall cabinets.
A decorative pendant can look beautiful and still leave the work surface in shadow, so judge each fixture by the job it must do, not only by how it looks. Pendants over an island usually contribute both task light and style, which is one reason their size, height and spacing should be decided once the island's final dimensions are set.
| Kitchen zone | Lighting purpose | Typical fixture or control | Coordination question |
|---|---|---|---|
| Preparation counters | Directed task light | Under-cabinet fixtures on their own switch | Cabinet edge, reflections and driver access |
| General circulation | Ambient light | Ceiling fixtures on a separate group | Joists, layout and shadows |
| Sink | Task light | Fixture or ceiling light aimed at the bowl | Window glare and surface reflections |
| Cooktop | Task light | Range hood lighting | Hood model and its built-in light |
| Island | Task and decorative light | Pendants or ceiling lights on a dimmer | Final island size and seating |
| Display | Accent light | In-cabinet or shelf lighting | Glass doors, shelf material and access |
Place ceiling lights to avoid shadows on the counter
One common mistake is laying out recessed lights in a neat grid centered in the room. When you stand at the counter, your body blocks that light and casts a shadow exactly where you are working. Positioning the perimeter ceiling lights over the front edge of the counters, rather than over the middle of the floor, reduces that shadow, with under-cabinet lights filling in the rest.
The final positions depend on joists, ductwork, cabinet heights and the wall cabinet doors, so ask for a reflected ceiling plan that shows each light relative to the cabinets. That drawing is also the best place to check that a light does not land directly in front of an upper cabinet door or too close to a wall where it creates a harsh scallop of light.
Coordinate under-cabinet task lighting with the cabinets
Under-cabinet lighting is the most useful task light in most kitchens, and it has to be designed with the cabinets. Decide whether the fixtures sit near the front or back of the cabinet bottom, whether a light rail or recessed channel will hide the light source from view, and where the power supply or driver will be located and accessed later. Glossy countertops and backsplashes can reflect a row of visible dots, so check the reflection on a sample of your actual counter.
Because these decisions affect cabinet details and the electrical rough-in, settle them before the cabinets are ordered. A quick mockup with a sample fixture under a sample cabinet, on the real counter material, is worth the effort.
For the island geometry: Can an island fit your kitchen? A space-planning guide
Read brightness and color information correctly
Compare light output in lumens, not watts. ENERGY STAR explains that brightness is measured in lumens, while watts describe energy use. As a reference, the old 60-watt incandescent bulb corresponds to about 800 lumens, a 75-watt to about 1,100 and a 100-watt to about 1,600. LEDs produce light far more efficiently, up to 90 percent more efficiently than incandescent bulbs according to ENERGY STAR, so a much lower wattage can deliver the same brightness.
Color temperature describes how warm or cool the light looks and is measured in kelvins. Lower numbers look warmer and more amber; higher numbers look whiter and cooler. It is separate from brightness. There is no single ideal for every kitchen, but keeping all fixtures in the same range avoids a patchwork look, and testing samples next to your cabinet and countertop finishes shows how they will really appear. If color rendering matters to you, ask for the products' published data rather than relying on a description.
LEDs rarely burn out suddenly. ENERGY STAR notes that they gradually lose brightness over time, and that heat management is the most important factor in how long they perform well, which is one more reason to follow the fixture manufacturer's installation requirements.
Choose controls and verify compatibility
Put each layer on its own control so the kitchen can shift between bright work light, softer evening light and a low setting for walking through at night. Typical groups are ceiling lights, under-cabinet lights, island pendants and accent lighting. Dimmers on the ambient and pendant groups add a lot of flexibility.
Dimmable on a product label does not guarantee smooth dimming with any dimmer. LED fixtures, their drivers and the dimmer must be compatible, and dimmer manufacturers publish compatibility information for specific models. Ask your electrician to confirm the exact combination before purchase, which avoids flicker, buzzing or lights that will not dim fully.
Resolve the electrical and construction sequence
Lighting changes usually mean new boxes, circuits or switch locations, so they belong in the electrical scope. In Fairfax County, new electrical equipment and fixtures require a residential electrical permit, trade permits are issued after the related building permit, and the permit holder is responsible for scheduling inspections. Your contractor and electrician determine the exact requirements for your project.
The sequence matters. The fixture layout, switch locations and control groups need to be approved before the electrical rough-in, because changes after drywall are disruptive. Fixtures with long lead times should be ordered early enough to arrive before the finish stage.
Source: Fairfax County: Residential electrical permits
Source: Fairfax County: Building and trade inspections
For selection deadlines: Kitchen remodeling timeline from design to completion
Review the installed lighting before closeout
When the lights are installed, test them the way you will use the kitchen. Stand at each work area and check for shadows and glare, look at the counters from the seating area, run each control and dimmer through its full range, and confirm the color looks consistent from fixture to fixture. Record any adjustments, and keep the product information, replacement part details and control instructions with your project records.
- Final kitchen plan with activities and routes marked
- Reflected ceiling plan with fixture positions
- Under-cabinet fixture type, position and driver location
- Lumens and color temperature for each fixture type
- Control groups, dimmers and switch locations
- Electrician's compatibility check for dimmers and LEDs
- Product information kept for future replacement
Next step: Plan kitchen lighting alongside the remodel layout with Graves
Common questions
What are the three layers of kitchen lighting?
Ambient lighting for general illumination, task lighting for counters, the sink, cooktop and island, and accent lighting for display areas. Each works best on its own control.
Where should recessed lights go in a kitchen?
Perimeter lights generally work better over the front edge of the counters than centered in the room, which avoids casting your own shadow on the work surface. Confirm final positions on a reflected ceiling plan.
Are watts a useful way to compare LED brightness?
No. Compare lumens for light output. Watts describe energy use, and LEDs produce the same light with far fewer watts than incandescent bulbs.
Will any dimmer work with a dimmable LED?
Do not assume so. Have the electrician verify the exact fixture or lamp, driver and dimmer combination using manufacturer compatibility information.
When should lighting choices be finalized?
Before the electrical rough-in and before cabinets are ordered, since fixture positions, under-cabinet details and switch locations depend on both.
Sources
Related reading
Published by Graves Design & Remodeling, Inc. · +17036604554
8346 Traford Ln Suite #7, Springfield, VA 22152